Since desktop computers equipped with a serial port are getting more and more scarce these days, Newton users are
facing increasing difficulties getting their Newtons connected. Consequently, hardware add-ons that equip
the Newton 2x00 models with a standard USB port come in handy.
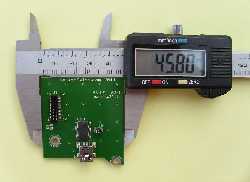
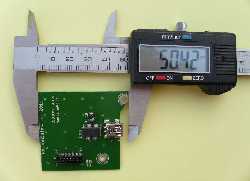
As luck would have it, someone in the EU asked me to fit his two Newtons with USB-001 boards, which provided me with a golden opportunity to write the review you are currently reading.
Note: Clicking the images below will open higher resolution images.
As luck would have it, someone in the EU asked me to fit his two Newtons with USB-001 boards, which provided me with a golden opportunity to write the review you are currently reading.
Note: Clicking the images below will open higher resolution images.
 At the time this review was written, the price was $62.99. Drivers (more on the driver issue later) can be
downloaded from the seller's web site or purchased on a PCMCIA memory card for an additional $10.00. Shipping
is $13.00.
At the time this review was written, the price was $62.99. Drivers (more on the driver issue later) can be
downloaded from the seller's web site or purchased on a PCMCIA memory card for an additional $10.00. Shipping
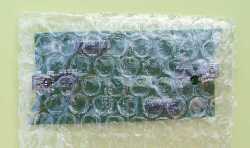
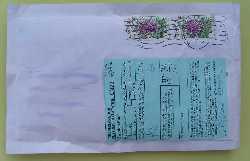
is $13.00.The boards came in a plain, padded envelope post-paid with $3.50 worth of stamps. Since they weigh next to nothing and are unlikely to break unless an elephant steps on the envelope, this packaging is sufficient.
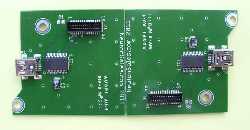 They were securely joined when I unwrapped them. This came as a bit of a surprise, since this board is
advertised as literally plug and play, simple to install.
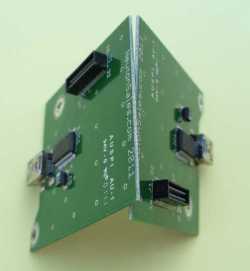 The good news is that it's not as big of a deal as you might think. Small printed circuit boards are almost
always combined into large panels to get the manufacturing costs down. Grooves are cut to provide predetermined
breaking points. Usually you can simply break them apart like you'd break a piece off a chocolate bar. It doesn't
take more than a second.
The good news is that it's not as big of a deal as you might think. Small printed circuit boards are almost
always combined into large panels to get the manufacturing costs down. Grooves are cut to provide predetermined
breaking points. Usually you can simply break them apart like you'd break a piece off a chocolate bar. It doesn't
take more than a second.However, people unaware of the basics of printed circuit board manufacturing might not know to do this.
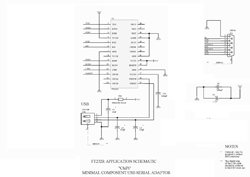 Ignoring minor differences, the circuitry follows FTDI's application schematic "ChiPi - Minimal Component
USB Serial Adaptor" except for two issues. Firstly, the optional Electromagnetic Interference (EMI) protection
capacitors at the USB data signal lines are left out. Secondly, the RESET# pin is tied to VCC and Ground by two
resistors as shown on page 24 of the
FT232R data sheet.
The latter left me puzzled, because it should only be done in host-powered circuits (the host in our case being
the Newton), whereas the USB-001 is powered from the USB bus. According to the datasheet, a USB bus powered
chip should have its RESET# pin either left unconnected or pulled up to VCC.
Ignoring minor differences, the circuitry follows FTDI's application schematic "ChiPi - Minimal Component
USB Serial Adaptor" except for two issues. Firstly, the optional Electromagnetic Interference (EMI) protection
capacitors at the USB data signal lines are left out. Secondly, the RESET# pin is tied to VCC and Ground by two
resistors as shown on page 24 of the
FT232R data sheet.
The latter left me puzzled, because it should only be done in host-powered circuits (the host in our case being
the Newton), whereas the USB-001 is powered from the USB bus. According to the datasheet, a USB bus powered
chip should have its RESET# pin either left unconnected or pulled up to VCC.Although the wealth of documentation and application notes available at the FTDI web site is nothing short of exemplary, it did not shed any light on whether this could ever cause a problem, so I got in touch with FTDI's customer support and asked for their opinion. Their customer support being as exemplary as their products' documentation, they replied less than two days later as follows:
This should not be a problem. When the FT232R is powered up by the VCC from the host port, the resistor divider will also pull RESET# high to allow the device to come out of reset. Reset will only be pulled down by your divider when there is no USB 5V present and in this case the FT232R will be unpowered too. We can't think of any problems with your configuration. In the very unlikely event that issues are seen, the 10K or the 10K and 4K7 resistors could be made non populated in future.
So, in a nutshell, these two resistors needn't be there, but they are unlikely to cause the USB-001 to start acting up on you. It would be a good idea, though, for the vendor to leave them out and spend the saved money on the optional EMI protection capacitors instead. Since I had never performed this particular type of surgery before, I was somewhat reluctant to risk another
person's well-preserved Newton to acquire first-hand experience. This is why I would now like to introduce you
to Frankenstein One, a proud member of a Newton family wholly assembled from Newton corpse parts that were in
very bad repair. The Frankenstein family's main occupation these days is testing rebuilt battery packs, but
I try to spice up their lives whenever possible.
 Frankenstein One willingly consented to act as a guinea pig. Having been missing his Interconnect Port for
years, this is hardly surprising. Newtons deprived of electrical stimuli for a longer time will almost always
jump at the chance to change this.
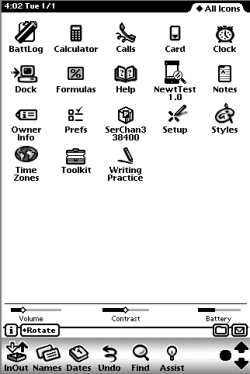 For each baud rate you want to use for connecting your Newton, a separate driver must be installed on it. These
drivers are available for download through the vendor's web site. In case you do not have a working serial
connection to install them, they will sell you the drivers on a 2MB PCMCIA memory card for an additional ten
bucks.
For each baud rate you want to use for connecting your Newton, a separate driver must be installed on it. These
drivers are available for download through the vendor's web site. In case you do not have a working serial
connection to install them, they will sell you the drivers on a 2MB PCMCIA memory card for an additional ten
bucks.Given the alarming rate at which essential Newton software is disappearing from the Internet, I sent an E-Mail to the copyright holder's address given in the driver's copyright notice, asking for permission to offer the driver packages for download from this page. The vendor, unfortunately, did not grant this permission, pointing out that they hold the copyright to this software instead of the person mentioned in the copyright notice.
If, by the time you are reading this, the drivers are no longer available from the vendor's web site, please drop me a line. Since they are almost exact copies of Filip R. Zawadiak's fast serial driver, writing them will take no more than an hour at most. The driver package, Filip's source code and even a Newton Toolkit project for creating the package file have been available for download at http://www.unna.org/view.php?/utilites/FastSerialConn for ages. The only change is enabling serial channel three on the Newton's Interconnect Port. This is no big deal, since how to do this is explained in detail on pages 21-4 and 21-5 of the Newton Programmer's Reference.
I managed to get in touch with Filip, who told me that his driver was published under the BSD license. This license allows redistribution and use in source and binary forms, with or without modification, provided that redistributions of source code retain the original copyright notice.
I will see to it that the drivers from the vendor's web site are included on the card lending system cards. The card lending system lets you "buy" a 20MB memory card at a moderate price. This card contains all the drivers (Ethernet, WLAN, Bluetooth, ...) required to set your Newton up for successful communication. Once these drivers are installed on your Newton, you can either keep the card or send it back. If you send it back, the purchase price minus the cost of shipping the card to you will be refunded.
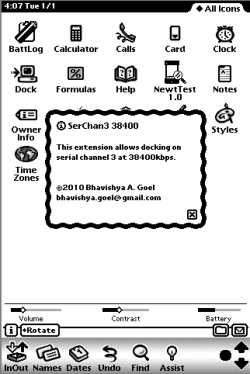
But let's return to the subject. Since the Newton will by default connect using a a bit rate of 38400 bits per second, which in my case had always worked hunky-dory, I only installed the SerChannel3_38400 driver. It appeared as SerChan3 38400 in the Newton's Extras Drawer.
 Internally, the Newton 2000 and 2100 models have four serial channels. Channel zero is used for the serial
connection via the Newton's Interconnect Port. Apple reserved channel one for optional infrared, channel two for
an optional keyboard and channel three for an optional modem. The serial interface signals of all four channels
are available at the mainboard connector that the USB-001 plugs into.
Internally, the Newton 2000 and 2100 models have four serial channels. Channel zero is used for the serial
connection via the Newton's Interconnect Port. Apple reserved channel one for optional infrared, channel two for
an optional keyboard and channel three for an optional modem. The serial interface signals of all four channels
are available at the mainboard connector that the USB-001 plugs into.With the Newton being discontinued in 1997, none of the above-mentioned options saw the light of the day, which lets third party hardware like the USB-001 use one of the other three serial channels. This is why you need custom drivers. If you were trying to connect using the Newton's built-in Serial setting, the data would be routed through serial channel zero (the Interconnect Port) and never end up at the USB-001.
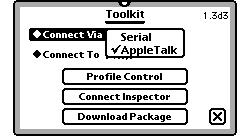 So hold your horses if you are planning on using your Newton for developing Newton software with Apple's
Newton Toolkit (NTK). Due to an unfortunate
lack of foresight among the NTK development team, connecting the NTK inspector is not accomplished using the
Newton's Dock application. Instead, this choice is hard-coded in the application. This is why you can't use
the NTK inspector while your Newton is connected via the USB-001.
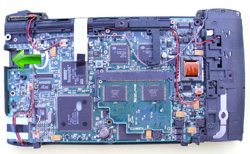 To install the board, the back part of the case (BPC) must be removed. Please click
here if you don't know how to do this.
To install the board, the back part of the case (BPC) must be removed. Please click
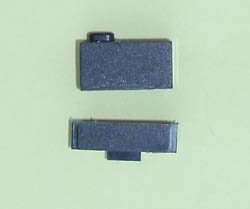
here if you don't know how to do this.Remove the modem blank (the little plastic piece next to the Interconnect Port indicated by the green arrow). Put it in a safe place. You will need it later. Get the grey microphone cable out of the way (it is almost always too close to the mainboard connector), then plug the board in.
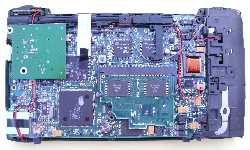 Surprisingly, the USB-001 did not come with screws to fasten it to the main logic board. Unless this is done,
the force applied to it while plugging and unplugging the USB connector will be applied to the solder joints of
the connectors that connect the USB-001 to the main logic board. These solder joints are extremely tiny and
will eventually fail and tear off through flexing. This has actually happened a few times with earlier models
of serial Newton boards with a similar form factor. Granted, the force required for plugging in a serial Mini-DIN
connector is much higher than that needed for plugging in a small USB connector, but why take a risk!
Surprisingly, the USB-001 did not come with screws to fasten it to the main logic board. Unless this is done,
the force applied to it while plugging and unplugging the USB connector will be applied to the solder joints of
the connectors that connect the USB-001 to the main logic board. These solder joints are extremely tiny and
will eventually fail and tear off through flexing. This has actually happened a few times with earlier models
of serial Newton boards with a similar form factor. Granted, the force required for plugging in a serial Mini-DIN
connector is much higher than that needed for plugging in a small USB connector, but why take a risk!The fact that the USB-001 has holes in the right places indicates that the vendor was aware of this problem when the board was developed.
In case your USB-001 was shipped without screws, all you'll need are two stainless steel machine screws (flat head, Phillips drive, length 3/8", #1-72). At the time this review was written (February 2012), a pack of 100 (part number B000FN5S0O) was available for $7.38 plus shipping through smallparts.com.
I've recently spent a small fortune on getting 100 of these screws to Germany, so I could send you two for about two bucks including worldwide shipping.
 After reassembly your Newton will be equipped with a standard Mini-B USB socket. The down side is that there's
now a pretty large opening where the modem blank used to be.
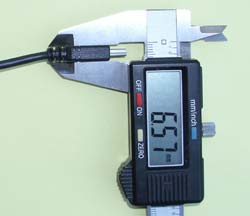
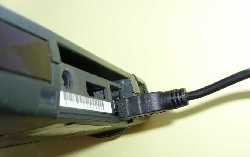 I wasn't able to plug a standard USB connector all the way in. This was because at the connector's bottom edge
the Newton's case was in the way.
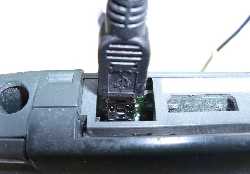 Unless you find a cable with a very flat plug, you will either have to cut into the plug's plastic coating or
follow the procedure described later on this page. If you decide to modify the plug's coating, you should do so
generously. For the reason outlined above, you do not want to apply too much pressure to the board or tilt it
when plugging or unplugging the USB cable. This would inevitably happen if the plug couldn't slide in and out
freely.
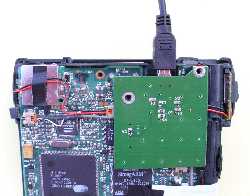 Since I wanted my cable to remain intact, I decided to remove Frankenstein One's BPC again. That way I was able
to plug the connector all the way in. After removing all metal parts from my desk to prevent shorts, I connected
Frankenstein One to my PC running Windows XP.
Since I wanted my cable to remain intact, I decided to remove Frankenstein One's BPC again. That way I was able
to plug the connector all the way in. After removing all metal parts from my desk to prevent shorts, I connected
Frankenstein One to my PC running Windows XP.Note: Since the USB-001 is powered from the USB bus, you do not need the Newton to set up the PC or Mac side. You can simply connect the board without the Newton.
The following will explain in detail how to get your Newton connected to a PC running Windows. If you'd rather connect it to a Mac running Mac OSX, please click here.
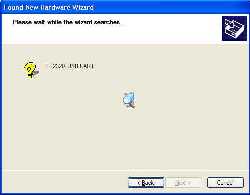
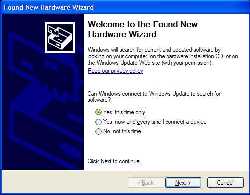
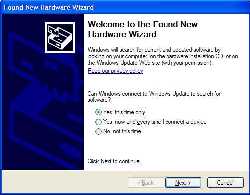 Windows XP found the new hardware and asked for permission to search for driver software. Since the interface
chip used on the board could be expected to be a standard converter chip, chances were good that Windows would
find such a driver, so I clicked the Next button.
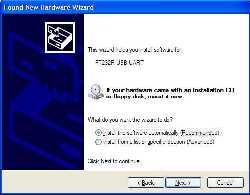 Windows found a
FT232R UART (Universal
Asynchronous Receiver/Transmitter), which is a standard USB to serial interface chip manufactured by Future
Technology Devices. I allowed Windows to install the software automatically...
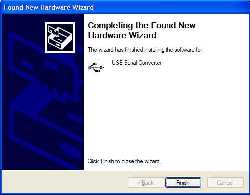
 On clicking the Finish button, I was presented with a dialog that
looked somewhat familiar, but who am I to contest the infinite wisdom of Microsoft Windows programmers, so I
clicked on the Next button once again.
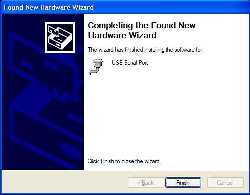
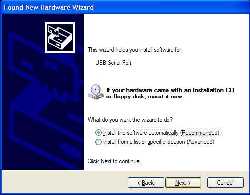 Windows seized the chance to install a Virtual COM port (VCP) driver. Virtual COM port drivers cause the USB
device to appear as an additional COM port available to the PC. Thus application software can access the USB
device in the same way as it would access a standard COM port.
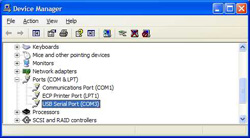 Make sure the Newton is connected to the PC. To verify that the Newton is recognized by Windows, start the
Windows Device Manager
(Start - Control Panel - System - Hardware - Device Manager). You should
see an entry for a USB Serial Port. Double-click the entry to show the Properties window.
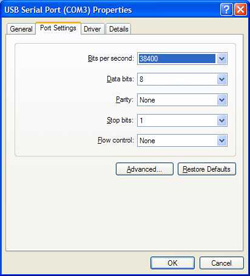 Select Port Settings and make sure the bit rate matches that of the
serial Newton driver you intend to use. Close the Windows Device Manager.
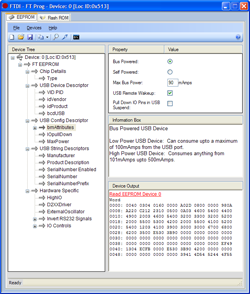 People both technically inclined and adventurous might now want to learn what makes the FT232R tick on the
inside. The FTDI web site provides us with
FT Prog, a free EEPROM
programming utility for use with FTDI devices. It is used for modifying EEPROM contents that store the
FTDI device descriptors to customize designs.
People both technically inclined and adventurous might now want to learn what makes the FT232R tick on the
inside. The FTDI web site provides us with
FT Prog, a free EEPROM
programming utility for use with FTDI devices. It is used for modifying EEPROM contents that store the
FTDI device descriptors to customize designs.Note that FT Prog is not required for connecting your Newton to a Windows PC. It will satisfy your curiosity if you are technically inclined, but it could just as well brick your USB-001 with a single mouse click. This would not only void your warranty, but also set you back a lot of hard-earned bucks. Keep your hands off FT Prog unless you know your way around computer hardware and software pretty well, otherwise you just might be tempting fate.
FT Prog needn't be installed. Simply uncompress the zip file and double-click on FT_PROG.exe. Then click on Devices in the menu bar and select Scan and Parse. FT Prog should now find the FT232R on your USB-001 board and present you with something pretty similar to what is shown in the image to the left.
Keep your hands off the Program button that appears when you click on the Flash ROM tab. The FT232R has an internal EEPROM, which is a user-modifiable read-only memory that can be erased and reprogrammed. This EEPROM tells the chip how the board developer wants it to interact with the outside world. Messing with this info can be something you'd regret forever.
 There should be an additional serial port COM3. Make sure the speed matches that of the serial Newton driver
you intend to use. Close the Settings window.
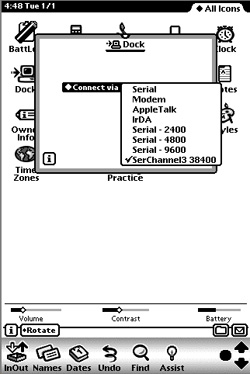 Now would be a good time to say a couple of humble prayers to your favorite deity. For good measure you might
also want to cross all available fingers. Tap Dock, select your
serial driver, and tap the Connect button.
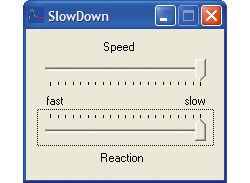 ...but not yet!
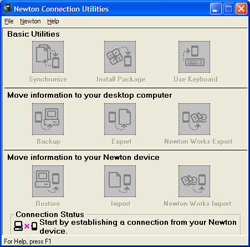
Unfortunately, serial connections between Newtons and modern PCs have always been unreliable. Connections will often terminate out of the blue, followed by mutual recriminations. NCU will report that the Newton disconnected, the Newton will claim that it was the PC's fault because it was the PC who disconnected.
Fortunately, there is slowdown.exe. This program will (not surprisingly) slow your PC down. On a modern PC you will need more than one instance of it. My 3.2 GHz dual-core Pentium 4 PC requires two instances with the sliders drawn all the way to the right. Your mileage may vary, so you'll have to experiment a bit. Be aware that too many instances will slow your PC down to almost a standstill, which will make your computer's CPU very hot and usually require a reboot following its use.
 Somehow I'd hoped Slowdown wouldn't be needed with the USB-001, but alas, it wasn't meant to be. I needed just
as many instances of it as when connecting via the Newton's Interconnect Port. The good news is that once these
instances were running, everything worked just fine.
Somehow I'd hoped Slowdown wouldn't be needed with the USB-001, but alas, it wasn't meant to be. I needed just
as many instances of it as when connecting via the Newton's Interconnect Port. The good news is that once these
instances were running, everything worked just fine.The following section will explain how to make the USB-001 work on a Mac running Mac OS 10.6.7 (Snow Leopard). To skip this section and proceed to the evaluation of the danger of cracks in your little green friend's case, please click here.
 And now for something completely different...
Here's how to establish a connection with a state-of-the-art Mac. In my case it was my trusty ol' Mac Mini, a 1.66 GHz Intel Core Duo machine running Mac OS 10.6.7 (Snow Leopard).
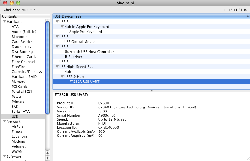
Once you have plugged the Newton into one of your Mac's USB ports, the Mac System Profiler (Applications - Utilities - System Profiler) should find the USB UART chip.
 Now you need to download and install a serial driver that will cause the USB device to appear as an additional
serial port available to the Mac. Thus application software can access the USB device in the same way as it
would access a standard serial port driver.
Now you need to download and install a serial driver that will cause the USB device to appear as an additional
serial port available to the Mac. Thus application software can access the USB device in the same way as it
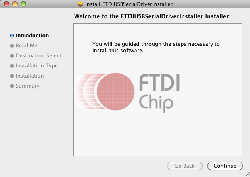
would access a standard serial port driver.On the UART chip manufacturer's download page these drivers are called VCP (Virtual Com Port) drivers. Since the Mac has never known COM ports, this is slightly misleading, but this driver must be installed nonetheless.
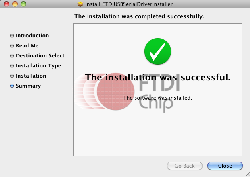
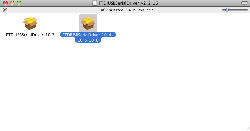
In my case it came in the form of the file FTDIUSBSerialDriver_v2_2_16.dmg. Double-clicking this file allowed installation for either Mac OS 10.3 or later versions.
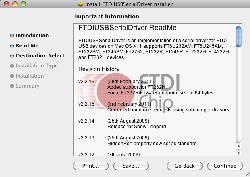 Since I wasn't all that much interested in the driver's software revision history, I clicked the
Continue button again.
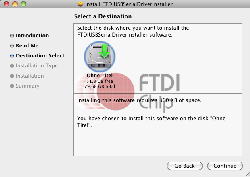
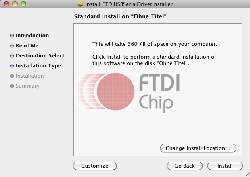 To people who have grown up with eight inch floppy disks, 4 MHz computers and the firm belief that no
computer will ever require more than 640kB of memory, it'll come as a pleasant surprise that the driver
requires no more than 360kB of disk space.
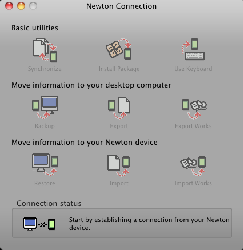 If you're the adventurous type, you might want to figure out if the
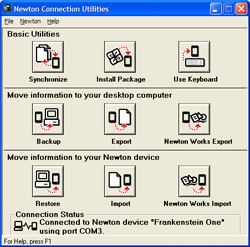
Newton Connection Utilities will
still run under Snow Leopard. However, with Simon Bell's excellent
Newton Connection (NCX) application there's
a much better option these days.
If you're the adventurous type, you might want to figure out if the
Newton Connection Utilities will
still run under Snow Leopard. However, with Simon Bell's excellent
Newton Connection (NCX) application there's
a much better option these days.NCX will connect at 38400 bits per second by default. It does not come with a user interface to change this, which is not an oversight, but a deliberate omission supposed to prevent users from inadvertently changing the speed and causing all kinds of confusion. Actually, using different speeds is possible, but a detailed description of how to achieve them would be beyond the scope of this review. For details have a look here. Be aware, though, that you should only attempt to change the default speed it if you know your way around Mac OSX pretty well.
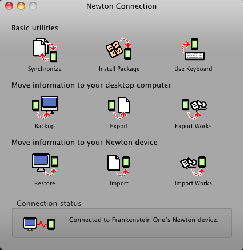
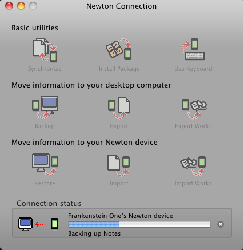
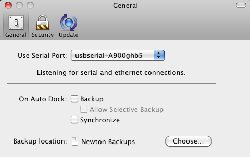 Select Newton Connection - Preferences. You should find a new serial
port. In my case it bore the somewhat weird name usbserial-A900ghbS.
 Close the Preferences window. Now would be a good time to again say a couple of humble prayers to your favorite
deity. For good measure you might also want to cross all available fingers. Then tap the
Dock button, select your serial driver, and tap the
Connect button.
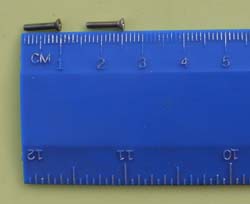 Normally, one would now have a glass of very decent single malt whisky and live happily ever after. However, you
might remember that Frankenstein One wasn't fully reassembled yet. There was still the problem of not being
able to plug the USB connector all the way in. Another unresolved problem was that the USB-001 board wasn't
properly secured yet. So I rummaged around in my huge supply of Newton parts until I finally found two
screws that were once supposed to fasten a SER-001, a board that provides the Newton with the standard Mini-DIN
jack the earlier Newton models have.
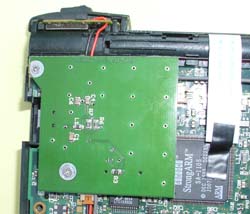 When fastened as tightly as advisable (remember they are screwed into plastic), their heads extended about
0.4 mm, which could have caused a problem. One or two courageously executed turns of a countersink tool
would probably have fixed this problem for good, but I refrained from doing so because I did not want to void
the owner's warranty.
When fastened as tightly as advisable (remember they are screwed into plastic), their heads extended about
0.4 mm, which could have caused a problem. One or two courageously executed turns of a countersink tool
would probably have fixed this problem for good, but I refrained from doing so because I did not want to void
the owner's warranty.By the time this review was written, two people had reported at NewtonTalk that after installing the USB-001, their Newtons' BPC had developed cracks. The vendor disputed this, so I thought it might help the gentle reader of this already way-too-long review if I attempted to shed some light on whether there was any danger of case cracks at all and, in case there was, what could be done about it. This required figuring out if any part of the USB-001 touched the BPC from the inside.
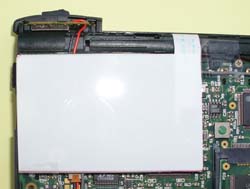 I first contemplated putting a tiny drop of paint on every component, reassembling the Newton, disassembling
it again, and checking the inside of the BPC. However, apart from the fact that this would have voided the
owner's warranty for sure, a drop of paint would have had almost the same height as some of the components,
so this might have indicated a problem where no problem was.
I first contemplated putting a tiny drop of paint on every component, reassembling the Newton, disassembling
it again, and checking the inside of the BPC. However, apart from the fact that this would have voided the
owner's warranty for sure, a drop of paint would have had almost the same height as some of the components,
so this might have indicated a problem where no problem was.This is where Prescale enters the picture. Prescale is an ultra-thin pressure measurement film. It is covered with color-forming microcapsules that will burst when pressure is applied. According to the manufacturer, it is the only film in the world for measuring pressure and pressure distribution reliably. Prescale's eight models cover a wide range of pressures from extremely low pressures to super-high pressures. Areas where pressure is applied become red in response, making it possible to check pressure magnitude and pressure balance.
More details are available here. The good news is that CMV, a German distributor, offers a free sample set. The white film you see in this picture was taken from the sample set they kindly sent me even though I made it clear that I would never make a significant contribution to their income statement.
Care must be taken while handling the film. Pressure applied accidentally would show immediately. The film should be secured carefully with one or two small pieces of cellophane tape to prevent it from moving. During resassembly (and the subsequent disassembly) the BPC should only be touched at the edges. Touching the area opposite the USB-001 might easily falsify the result.
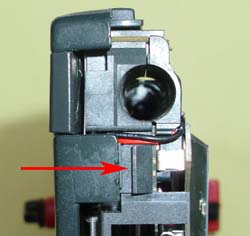 Even though the additional screws protruded less than half a millimeter, the top one prevented the case's
snap lock mechanism from working correctly. It worked hunky-dory when the top screw was missing.
Even though the additional screws protruded less than half a millimeter, the top one prevented the case's
snap lock mechanism from working correctly. It worked hunky-dory when the top screw was missing.I left the screw in place nonetheless. This was partially because I was afraid of spoiling the Prescale film by adding another disassembly / reassembly cycle and partially because I wanted to learn about the pressure distribution when the BPC wasn't as close to the USB-001 as it would normally be.
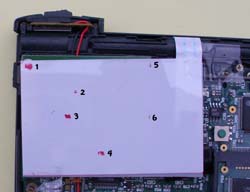 Since according to Fuji's FAQs there's no limit for pressure application unless pressure is repeatedly applied,
I reassembled the Newton and left it alone for a day.
Since according to Fuji's FAQs there's no limit for pressure application unless pressure is repeatedly applied,
I reassembled the Newton and left it alone for a day.This (well, except for the numbers, of course...) is what I saw when I disassembled it again. Considering that the top screw had prevented the BPC from being fastened correctly, it can be assumed that the pressure indicated here would have been even stronger under normal conditions.
The numbers mark the following components:
1: The top screw.
2: Capacitor C4.
3: Ferrite bead L1.
4: Resistor R3.
5, 6: The bottom edge of the USB-001 board.
The bottom edge issue could be ignored. The pressure was negligible. Apart from that, it wouldn't cause undue stress on the BPC if it had to press the USB-001's edge down ever so slightly.
C4 was unlikely to cause any problems, either. The little pressure indicated was caused by a minute misalignment during soldering, which can always happen and is perfectly normal. Instead of being positioned flat on the board, it was tilted ever so slightly upwards.
As shown in the two pictures above, the top screw prevented the snap lock mechanism from working unless significant pressure was applied to the two case parts. Doing this, however, would almost certainly cause cracks in the BPC in the long run. Leaving the screw out, on the other hand, would re-introduce the problems explained above.
The bottom screw, by the way, will never cause any problems. It has enough room since the BPC is slightly curved and provides more headroom in its middle area.
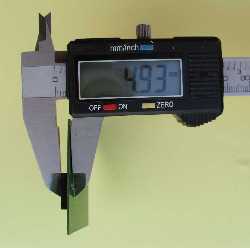
R3, in my opinion, was a problem. So was L1, which was to be expected, since (on my boards) with an above PCB height of 1.1 mm it was the highest component.
Now, my dear reader, is the time to make a decision...
Be aware that no two Newtons are exactly identical. Like everything manufactured on this planet, both Newtons and USB-001s are manufactured with tolerances. As a result, there might not be a problem at all with your Newton. On the other hand, things might be much worse. The question is: How far you are willing to go in order to eliminate all risk to your trusty green friend? After all, a crack in the BPC, were it to occur at all, would be a cosmetic problem and wouldn't kill your Newton. Moreover, Newton parts aren't that difficult to come by these days, and if you can install a USB-001, you can easily replace a BPC.
You could begin defusing the situation by not fastening the USB-001 with screws. This would re-introduce the flexing danger explained elsewhere on this page, but if you make sure to always move the USB connector into and out of its jack very gently and absolutely not tilted, this might never happen. Unfortunately, there's no long-term data on this yet. You simply can't know whether this strategy would prevent damage to the connectors. Apart from that, there's still an issue with L1.
The next step could be to loosen the top and middle screws that fasten the BPC. This would relieve some of the pressure, but probably not all that much unless you also disable the snap lock mechanism. This can be done by filing off the edges on both case parts. My gut feeling is that loosening the screws and disabling the snap lock mechanism would solve all your problems even if you fasten the USB-001 with screws. But, again, there's no long-term data on this yet.
In my humble and admittedly very personal opinion all these measures would not be solutions, but poor workarounds with unknown long-term results. No self-respecting engineer would even remotely consider such a measure a decent solution. Apart from that, my advanced age requires all problems to be fixed in a way that guarantees I won't have to spend any more time on them in the future. So I decided to take what some might consider drastic measures.
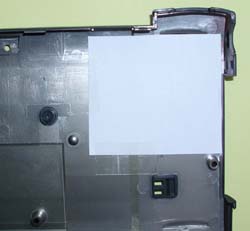 Of course, the safest way to prevent pressure between the USB-001 and the BPC is by making sure there's no
BPC where the USB-001 is. So, for a start, put a piece of paper into the BPC and fasten it with
cellophane tape.
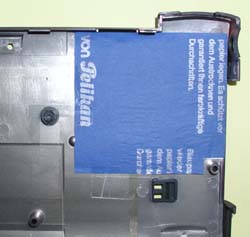 People my age might still remember what this is. Those who don't will find it interesting that this is the
reason why the text field you use for entering additional E-Mail addresses is labeled
cc, which means carbon copy.
A carbon copy was produced in a typewriter, which was what people would use for producing duplicates before
there were computers and printers. People would put a sheet of carbon paper between two paper sheets. Provided
they a) hit the keys with enough force and b) hadn't put the carbon paper the wrong way in, it precluded the
need to type the document a second time.
People my age might still remember what this is. Those who don't will find it interesting that this is the
reason why the text field you use for entering additional E-Mail addresses is labeled
cc, which means carbon copy.
A carbon copy was produced in a typewriter, which was what people would use for producing duplicates before
there were computers and printers. People would put a sheet of carbon paper between two paper sheets. Provided
they a) hit the keys with enough force and b) hadn't put the carbon paper the wrong way in, it precluded the
need to type the document a second time.What you see here is a piece of a sheet of carbon paper that had spent the last 25 years unused in my drawer. If anybody should ever tell you that things you haven't used for more than a decade could just as well be thrown away: Don't believe him. Send him home. He's utterly wrong.
Make the carbon paper large enough to remove it without moving the white paper, then fasten it with cellophane tape. Reassemble the Newton. Press the part of the BPC opposite the USB-001 a couple of times to get a good, clear image, then remove the BPC and the carbon paper.
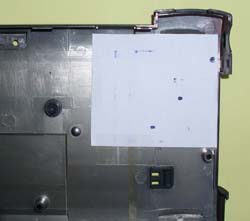 You should now have a mirror image of that on the Prescale film. Very likely things will look
differently in your case due to the inevitable manufacturing tolerances of the Newton and the USB-001.
You should now have a mirror image of that on the Prescale film. Very likely things will look
differently in your case due to the inevitable manufacturing tolerances of the Newton and the USB-001.Keen observers might be wondering why I used the Prescale film in the first place when I could obviously have produced the image using simple paper and carbon paper. The reason is that the film is much thinner. Putting something thicker between the USB-001 and the BPC might have indicated problems that wouldn't have existed under normal circumstances.
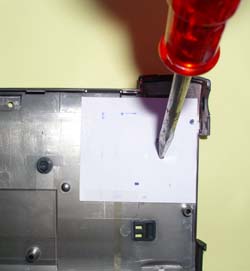 Punch-mark the centers of the markings. If you do not have a decent punch, a nail will suffice. As you will
see in a minute, this step requires accuracy and precision.
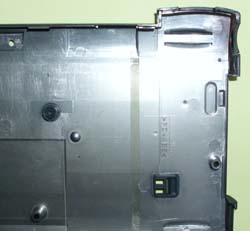 After punch-marking, get your drilling machine and (depending on how much you trust your punching skills)
either a four- or a five-millimeter drill.
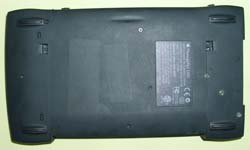 If you have a USB cable with a connector thin enough to allow plugging it in fully, you can now reassemble
your Newton for the last time. Unless, of course, you want to improve the overall result some more, in which
case I'd suggest leaving it open for just a little bit longer.
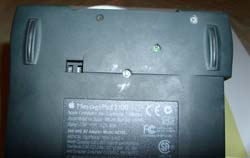 Now is a good time to remind those of you who aren't sound asleep by now that clicking the images
will open higher resolution images. If you click the image to the left, you'll notice two things: R3 and L1 do
in fact protrude slightly into their new hole, and my accuracy was suboptimal when punch-marking the hole for
the upper screw.
Now is a good time to remind those of you who aren't sound asleep by now that clicking the images
will open higher resolution images. If you click the image to the left, you'll notice two things: R3 and L1 do
in fact protrude slightly into their new hole, and my accuracy was suboptimal when punch-marking the hole for
the upper screw.For good measure you might want to fill the holes with drops of silicone. I omitted this step since the USB-001 wasn't mine and I did not want to void the owner's warranty.
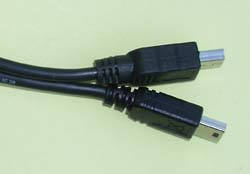 After having prevented potential case cracks once and for all, now for the last remaining problem. I went on a
shopping spree searching for a cable with a thinner USB connector. As you can see, I succeeded.
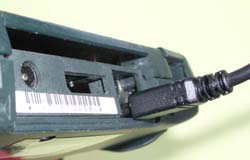 Unfortunately, it still wasn't thin enough. Its insulation being but one millimeter thick, cutting any of it
off wasn't an option.
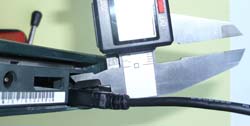 If you have the same problem, I'd recommend filing the little that's still causing problems off the BPC.
Before you remove the BPC for the umpteenth time, you might want to measure the gap between the upper edge
of the connector and the Newton's case.
 Hopefully you can still remember where you put the modem blank. After removing the BPC and the USB-001, plug it in and
mark the edge facing you.
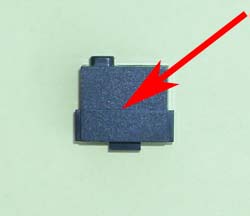 Subtract one millimeter from the gap you just measured and mark the modem blank accordingly. The side you
marked in the previous step is what will be thrown away, so make sure you mark the modem blank correctly. In
the pictures to the left and below the upper part is what you will keep.
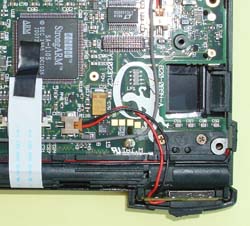 If you have infinite trust in the accuracy of your work, you can now glue the modem blank fragment on all
three sides to the case. If you haven't, you should first reassemble everything and make sure
the connector can finally be plugged and unplugged without a problem.
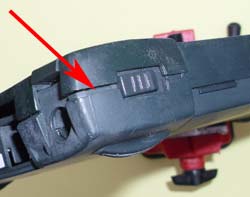
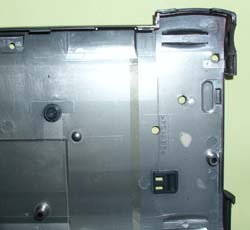
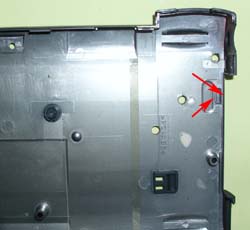 Finally, we'll clear the way for the USB connector. For this the case edge and the little thingie next to it
(both indicated by the arrows) must be filed off.
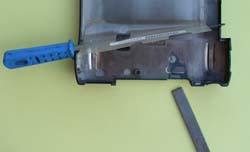 Keeping the transparent isolation layer out of the way will make this procedure much easier.
Pardon? You are wondering where the three holes have suddenly got to? There you have me...
The BPC I've been using so far isn't Frankenstein One's at all. He asked me to, but I couldn't use it for this review because it was already badly cracked long before the USB-001 was conceived. However, for the sake of peaceful cohabitation, I decided to let him have his way at least once, which is why the BPC shown in this picture is his.
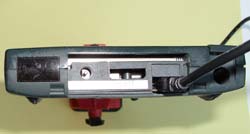 This is about as good as it gets. Of course, if you hadn't simply sawn the modem blank all the way
through, but cut out a rectangular piece instead, even the tiny hole that's still to the left of the
connector would now be gone.
This is about as good as it gets. Of course, if you hadn't simply sawn the modem blank all the way
through, but cut out a rectangular piece instead, even the tiny hole that's still to the left of the
connector would now be gone.But that's what decent engineering is all about; learning from building a prototype, and making sure to incorporate your findings into the next revision.
Conclusion...
These days I am always pleasantly surprised when I hear of new hardware for the Apple Newton. After all, even the most optimistic entrepreneur must know that the number of possible customers will be limited. He must put up a lot of money up front without knowing if he'll ever break even. Anyone daring to take this risk should be acknowledged and encouraged.
The USB-001 is a professionally manufactured Newton accessory. The soldering quality, for example, exceeds that of many items I've seen in the Newton accessory department by far. This makes it all the more surprising that the potential problems outlined in this review haven't been addressed at all. The potential crack problem, for example, could have easily been solved by simply placing all components on the opposite side and fitting the board with screw holes that prevent countersunk screws from protruding.
By not including fastening screws (or, at least, instructions that mention the danger of not securing the board with screws when installed), the people who install the board as-is could end up being... well... I won't say it. This review has shown that using screws with the current board design would still have its drawbacks. Nonetheless, I, for one, would have appreciated being at least informed of this issue.
USB cables can be purchased for less than a buck these days. So it might be a good idea to offer a moderately-priced USB cable with the USB-001 whose connectors are slim enough to prevent having to attack one's Newton with a file.
Would I buy a USB-001 for my own Newton? No, I wouldn't. I don't need one - yet. I've never had any problems using the Newton's built-in serial port. But if it ever came about that my desktop computer is lacking such a port, a USB-001 would be the first thing I'd try to get my hands on. After dozens of my own editorial reviews of the instructions I wrote above, I now know exactly how to ensure that our precious little friends will stay unharmed, alive, and kicking.


